Timer Relay Wiring, Selection and Applications: A Complete Guide for Industrial Automation
Harnessing precision control in industrial automation often comes down to timing. Timer relay units—sometimes called time relays, industrial timer relays or time delay relays—let you insert a programmable delay before contacts change state. Whether you’re selecting a DIN‑rail timer relay for a control panel, wiring an on‑delay timer into a circuit, or comparing models for different supply voltages and contact types, understanding how these devices work is essential. This guide covers the working principle, wiring diagrams for on‑delay, off‑delay, cycle, interval and star‑delta relays, and a comprehensive selection checklist so you can confidently choose the right device for your application.
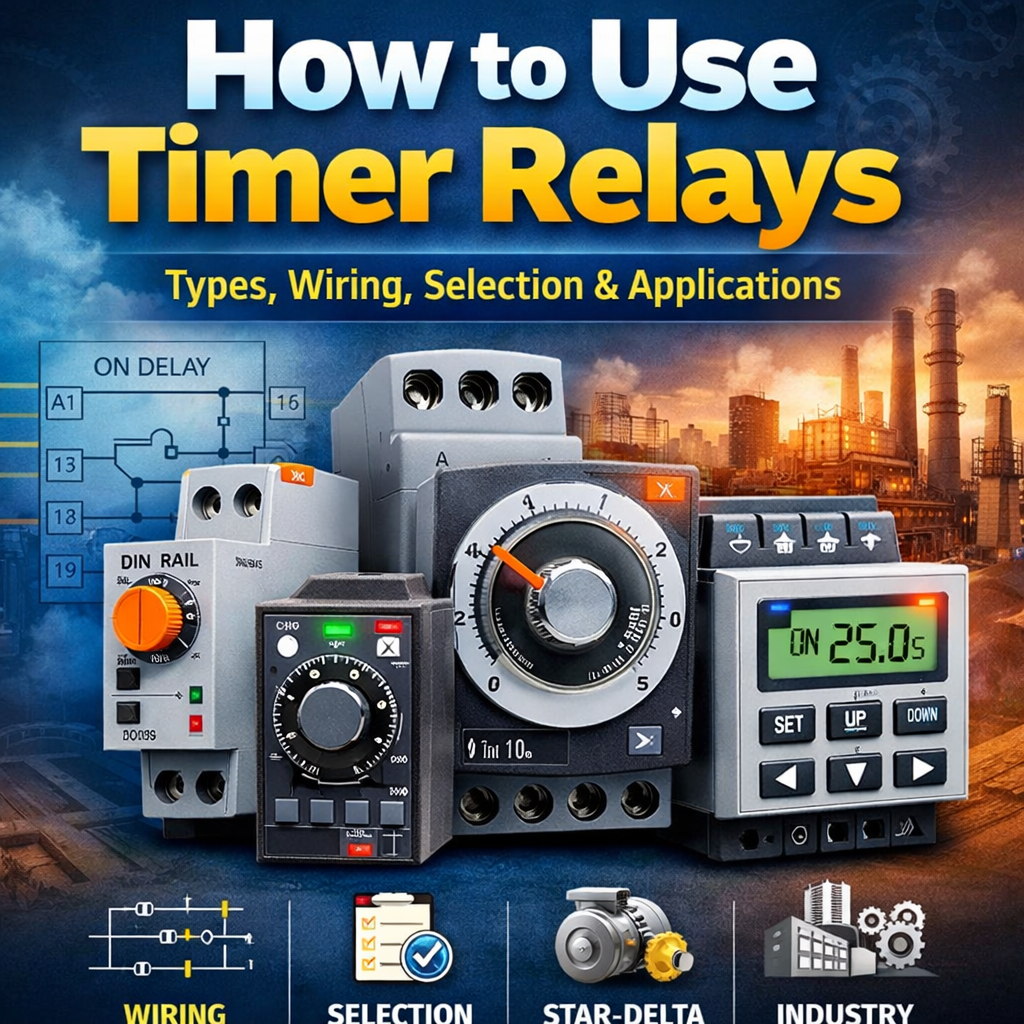
How to Use Timer Relays: Types, Wiring, Selection and Industrial Applications Guide
Modern control systems rely on precise timing to start motors, sequence processes and protect equipment. A timer relay (or time relay) delays the opening or closing of a circuit for a predetermined period. Unlike a regular relay that switches immediately, the timer relay’s built‑in timing circuit can delay action from milliseconds to hours. This guide demystifies how these devices work, provides practical timer relay wiring diagrams, and explains how to choose the right time delay relay for your control circuit. Whether you’re an engineer wiring your first control panel or a maintenance technician replacing an existing unit, you’ll find practical advice and clear examples.
TL;DR
- Timer relays delay switching: A time delay relay introduces a programmable delay before contacts change state, enabling safe sequencing and equipment protection.
- Understand the types: On‑delay, off‑delay, interval, cycle (flasher) and star‑delta functions determine when the relay contacts operate. Multifunction relays combine several modes.
- Wiring matters: Wire the power supply (A1/A2) correctly, then connect the control input (B1) and load contacts. On‑delay uses the common (COM) to normally‑open (NO) terminals; off‑delay wiring is similar but uses an off‑delay function.
- Selection depends on six factors: Choose timing function, voltage & power supply, contact configuration, timing range & accuracy, mounting style and environmental protection.
- Match load & environment: Ensure contact ratings can handle your load current; confirm the relay’s voltage matches the control supply; pick a mount (plug‑in, DIN rail or panel) that suits your enclosure; and verify IP and vibration ratings for harsh environments
Understanding Timer Relays and How They Work
Timer relays add a delay before contacts switch, enabling processes to occur in a controlled sequence. According to the Tameson technical guide, a time delay relay is “an electromechanical or electronic device that controls the opening or closing of contacts after a predetermined time interval”. Unlike standard relays, these devices introduce a programmable delay before the contacts change state; the delay can range from milliseconds to hours. This functionality is vital for preventing short cycling, staggering motor starts, or ensuring lights remain on for a specific time.
A typical timer relay contains a coil or electronic circuit to energize the timing mechanism, output contacts (normally open/closed) and sometimes an extra control input. Tameson explains that the working principle involves several stages: an input signal activates the relay’s timing mechanism; the delay period is counted down; and once the preset time elapses, the contacts change state. The relay then maintains the new state until the input is removed or reset. Electronic designs use capacitors or microcontrollers for timing; electromechanical versions may employ clockwork mechanisms. Many relays offer adjustable dials or digital programming to set the delay.
Single‑function and multi‑function types
Timer relays fall into two broad categories: single‑function and multi‑function. Single‑function models perform one timing operation only. The most common types include:
- On‑delay (delay‑on make) – the relay energizes its output after the delay time expires when the supply is applied. This is useful for motor start delays or conveyor sequencing.
- Off‑delay (delay‑on break) – the output energizes immediately when power is applied and remains on for the preset time after power is removed. Typical uses include keeping a fan running after a machine stops.
- Interval (one‑shot) – the relay energizes its output immediately upon trigger and switches off after the set time; often used for precise pulse control.
- Cycle (flasher or repeat cycle) – the relay repeatedly turns the output on and off according to an on‑time and off‑time setting. Applications include flashers or periodic pump operation.
- Star‑delta – designed for motor‑starting circuits, it provides a short delay between starting in star configuration and switching to delta to reduce inrush current.
Multi‑function timer relays incorporate several timing modes (e.g., on‑delay, off‑delay, cycle and interval) into one unit. They are ideal for complex control panels where flexibility is needed.
Where timer relays are used
Time delay relays appear throughout industrial automation and building systems. They manage sequential start/stop of conveyor belts, coordinate solenoid or actuator timing, control compressor run‑on to prevent short cycling, and ensure lighting remains on for a minimum time. Other uses include intermittent windshield wiper operation in vehicles, delayed closing of access doors and timed irrigation cycles. Because of their versatility, time relays are staples in HVAC, security systems, process control and power management.
Key Takeaways:
- A timer relay adds a programmable delay before contacts change state, ensuring orderly system sequencing.
- On‑delay, off‑delay, interval, cycle and star‑delta are the main single‑function types; multi‑function units combine several modes.
- Timer relays are used in industrial automation, HVAC, security, lighting and process control to manage start/stop sequences and protect equipment.
[Internal link suggestion: Learn more about timer relay operating principles]
Wiring Timer Relays: On‑Delay, Off‑Delay, Cycle, Interval and Star‑Delta
Correct wiring is vital to ensure your timer relay wiring functions safely and accurately. While different manufacturers may arrange terminals differently, most relays share common terminals: A1/A2 for the power supply (coil), B1 for an optional control input, and load contacts (COM, NO, NC). VIOX’s wiring guide notes that plug‑in 8‑pin and 11‑pin socket relays may display only pin numbers rather than IEC labels, and pin assignments can vary—always consult your datasheet.
Power supply and control input
The first step is to connect the relay’s control power. Ensure the supply voltage matches the rating printed on the relay. Common control voltages include 24 V DC, 24 V AC (often used in HVAC systems), 120 V AC and 240 V AC. Applying the wrong voltage can damage the relay or cause unreliable operation. For DC units, observe polarity by connecting positive to A1 and negative to A2. AC units do not require polarity, but it’s good practice to connect the neutral to A2.
Some multifunction relays have a separate B1 control input for triggering the timing. This input expects a dry contact and can be wired to a pushbutton, limit switch, proximity sensor, auxiliary contact or thermostat. Functions such as external‑start on‑delay, interval timing and repeat cycle all require B1 to initiate timing. If your relay lacks B1, timing begins automatically when the A1/A2 supply energizes.
On‑delay wiring
For on‑delay applications, wire the load through the relay’s common (COM) and normally open (NO) contacts. VIOX explains that you connect COM to terminal 15 and NO to terminal 18 on an 8‑pin or 11‑pin SPDT relay. When the relay energizes, the contact closes, powering the load after the set delay. Use A1/A2 to supply power; once power is applied, timing begins, and after the delay expires, the load energizes.
Off‑delay wiring
Off‑delay wiring is similar but uses the off‑delay function. The relay energizes the load immediately when power is applied and keeps it energized for the preset delay after power is removed. You still wire through COM and NO; the difference lies in the selected timing mode. This is useful for keeping fans or pumps running after equipment stops.
Interval, cycle and star‑delta wiring
For interval (one‑shot) timers, a momentary contact closure at B1 triggers the output, which then stays on for the set time before turning off. The load is wired through COM and NO. Cycle timers (repeat cycle or flasher) alternate between on and off periods; you usually set two knobs for on‑time and off‑time. Wire the load through COM‑NO and connect B1 to a trigger contact; the relay cycles continuously while B1 remains closed. Star‑delta timers are wired into motor starters: a start button energizes the timing relay, which first powers the motor in star configuration via the star contactor. After the star‑time setting expires, the relay opens the star contactor and closes the delta contactor; a built‑in auxiliary contact prevents overlap.
Tips for clean wiring
- Label wires and verify pin mapping: Because manufacturers can assign different functions to the same pin numbers, always confirm with the datasheet.
- Fuse the supply: Protect the control power circuit with a small fuse (e.g., 1 A) to avoid damage if wiring faults occur.
- Keep wires short and tidy: Short runs minimize voltage drop and electrical noise. Use cable ties and routing channels in your control cabinet.
- Test before applying load: After wiring, energize the relay without connecting the load to verify timing and function. Adjust settings as needed.
Key Takeaways:
- Always match the control voltage (24 V DC, 24 V AC, 120 V AC, 240 V AC) and observe polarity for DC units.
- On‑delay and off‑delay relays wire through COM and NO; timing begins when the A1/A2 supply is applied or removed.
- Use the B1 control input to trigger interval or cycle functions; label wires and consult your datasheet because pin assignments vary by manufacturer.
[Internal link suggestion: Learn more about timer relay wiring diagrams]
Selecting the Right Timer Relay: Specifications and Factors
| No. | Selection Factor | What to Check |
|---|---|---|
| 1 | Timing Function and Operating Mode | Decide which timing function your application requires, such as on-delay, off-delay, interval, cycle (flasher), single-shot, or star-delta. Multi-function timer relays can combine several modes in one unit, reducing inventory but usually costing a little more. |
| 2 | Voltage and Power Supply | Match the relay’s control voltage and contact voltage to your system power supply. Common options include 12 V DC, 24 V AC/DC, 110 V AC, and 230 V AC. Using the wrong voltage may damage the relay or cause unstable operation. |
| 3 | Contact Configuration and Current Rating | Choose the right contact type for your load. SPDT relays provide one changeover contact, while DPDT relays switch two independent circuits at the same time. Always make sure the contact current rating is higher than the maximum load current. For heavy loads, consider relays with multiple contacts or use interposing contactors. |
| 4 | Timing Range and Accuracy | Select a timing range that fully covers your required delay. Some relays are designed for short delays such as 0.1 s to 10 s, while others support minutes or hours. Accuracy is also critical, especially for synchronized processes. In most cases, electronic timers provide better accuracy than electromechanical designs. |
| 5 | Mounting Style and Form Factor | Consider how the relay will be installed. DIN-rail timer relays are common in control cabinets and save panel space, panel-mount relays are fixed directly onto front panels, and plug-in relays are easy to replace through socket bases. Always confirm the physical size fits your available installation space. |
| 6 | Environmental and Mechanical Protection | Evaluate the working environment carefully. If the relay will be exposed to dust, moisture, vibration, or temperature extremes, check the IP rating, sealing design, operating temperature range, and vibration resistance. For harsh industrial conditions, choose sealed or encapsulated models. |
| 7 | Ease of Adjustment and User Interface | Look for relays with clear dials, readable scales, or digital displays to reduce setup errors. Some modern timer relays also support smartphone setup or NFC programming, which can save time during commissioning and maintenance. |
Choosing the correct timer relay can feel daunting, but focusing on key specifications simplifies the process. C‑Lin’s technical article highlights seven essential factors to consider. Use this checklist when comparing models:
1 Timing function and operating mode
Decide which timing function your application needs. Options include on‑delay, off‑delay, interval, cycle (flasher), single‑shot and star‑delta. Multi‑function relays provide multiple modes, reducing inventory but costing slightly more.
2 Voltage and power supply
Match the relay’s control and contact voltage to your system’s power supply. Common control voltages are 12 V DC, 24 V AC/DC, 110 V AC and 230 V AC. Applying the wrong voltage can damage the relay or cause malfunction.
3 Contact configuration and current rating
Select the appropriate contact type for your load. SPDT (single‑pole double‑throw) relays provide one changeover contact; DPDT (double‑pole double‑throw) relays switch two independent circuits simultaneously. Ensure the contact’s current rating exceeds the load’s maximum current to avoid welding or premature failure. For heavy loads, consider relays with multiple contacts or use interposing contactors.
4 Timing range and accuracy
Choose a timing range that covers your required delay. Some relays span 0.1 s to 10 s; others offer ranges up to hours. Accuracy specifies how closely the actual delay matches the set value—important for synchronized processes. Electronic timers typically provide higher accuracy than electromechanical types.
5 Mounting style and form factor
Consider the installation method: DIN‑rail timer relays snap onto standard rails and save panel space; panel‑mount relays screw into front panels; plug‑in relays fit into socket bases for easy replacement. Measure the available space to ensure the relay fits comfortably.
6 Environmental and mechanical protection
Industrial environments may expose relays to dust, moisture, vibration and temperature extremes. Check the IP rating to assess protection against dust and water. For harsh conditions, choose sealed or encapsulated relays. Also verify the operating temperature range and vibration resistance if the relay will be mounted on machinery.
7 Ease of adjustment and user interface
Relays with clear dials or digital displays reduce setup errors. Look for intuitive controls, readable scales and, if possible, programming via smartphone or NFC. User‑friendly interfaces save time during commissioning and maintenance
Additional considerations
- Time relay specifications: Review datasheets for delay accuracy, mechanical life, electrical life and integral suppression features. Some relays, like those in Siemens’ SIRIUS 3RP series, offer universal control voltages (24–240 V AC/DC), multiple timing ranges (milliseconds to hours), repeat accuracy under ±1 %, high mechanical endurance (30 × 10⁶ operations) and surge suppression【503238453898086†L321-L335】.
- Voltage selection: If your control system uses low‑voltage PLC outputs, choose a DC‑powered relay. For simple panels without DC power supplies, AC‑powered relays (120/240 V) may be easier. Always check that the coil voltage matches your control circuit.
- Contact types: Beyond SPDT and DPDT, some relays provide three‑pole contacts or additional auxiliary contacts for feedback or interlocking. Determine how many circuits you need to control.
- Safety and standards: Look for relays that comply with IEC 61812 and UL standards for timing relays. Compliance ensures reliable operation and safety. (Consult your manufacturer’s data sheet for specific certification references.)
Key Takeaways:
- Use the seven factors—timing mode, voltage, contact configuration, timing range, mounting style, environmental protection and user interface—to guide your selection.
- Ensure control and contact voltages match your power supply and choose contacts rated for your load current.
- Choose the mounting style and environmental protection level that fit your panel space and operating conditions.
[Internal link suggestion: See our timer relay selection guide for more details]
FAQ
What is the difference between an on‑delay and off‑delay timer relay?
An on‑delay timer relay begins timing when power is applied and energizes its output after the set time. It is commonly used to delay starting motors or conveyor belts. An off‑delay timer relay energizes its output immediately and starts timing when power is removed; it keeps the load energized for the preset interval before de‑energizing. Off‑delay relays are often used for cooling fans or pumps.
How do I wire a timer relay control circuit?
First, match the relay’s rated voltage to your control supply. Connect the power to terminals A1 (positive or line) and A2 (negative or neutral). If the relay has a control input B1, wire a pushbutton or other triggering device between B1 and A2. Wire your load through the common (COM) and normally open (NO) contacts for on‑delay and off‑delay functions. Consult the datasheet for exact pin assignments because manufacturers may assign different functions to pin numbers.
What factors should I consider when choosing a timer relay?
According to C‑Lin’s selection guide, consider the timing function (on‑delay, off‑delay, interval, cycle, etc.), voltage and power supply, contact configuration (SPDT vs DPDT), timing range and accuracy, mounting style (DIN rail, panel or plug‑in), environmental protection (IP rating, vibration resistance) and ease of adjustment. Additionally, ensure that the relay’s contact rating exceeds your load current and check for compliance with international standards.
Conclusion & Call‑to‑Action
Timer relays are the unsung heroes of industrial control. By introducing a controlled delay before contacts change state, they prevent equipment damage, synchronize processes and improve safety. Understanding how each type—on‑delay, off‑delay, interval, cycle and star‑delta—works allows you to wire them correctly and troubleshoot issues quickly. Matching the relay’s timing function, voltage, contact configuration, timing range, mounting style and environmental rating to your application ensures reliable operation and long service life.
If you’re upgrading a control panel or designing a new system, consider our CDGKZ range of multi‑function timer relays. They offer universal voltage inputs (24–240 V AC/DC), multiple timing functions and easy DIN‑rail mounting—ideal for industrial automation. Need help selecting the right timer relay or customizing one for your project? Contact our technical team for expert advice and competitive pricing.
